Using Qlab to control a projector shutter
This tutorial was originally posted on the 12th May 2019
Have you ever wanted to be able to control your projector shutter within your Cue Stack? It's a very simple request that can become a very complex issue without the right knowledge.
Luckily this post is here to hopefully save you some time. (I have also attached a demo file at the bottom of this page)
I'm going to be demonstrating this using the serial commands for a Christie D12wu-h. The same commands I am using should work for all Christie H Series projectors.
First, I should point out that this tutorial is aimed at firing a TCP command out of Qlab. Therefore if you are wanting to fire something else such as OSC etc, this tutorial will not work for you. Although feel free to message me and I will help as much as possible.
Step 1
You are going to want to find the command you need to use to open and close your projector shutter. This will be under something like "TCP Command" or "Serial API Command".
Step 2
Ensure that your projector and Qlab machine are on the same network with all IP Addresses and other network information set so that the two devices can see each other and talk. A simple ping command from the terminal should be enough to test this. The command below can be copied. Remember to replace the IP address "192.168.88.1" with the IP address of your projector.
Ping 192.168.88.1
Step 3
Next, Inside Qlab you will want to either open a new project or open the current project you are working on. Once this has loaded you will want to insert a Script Cue.
Step 4
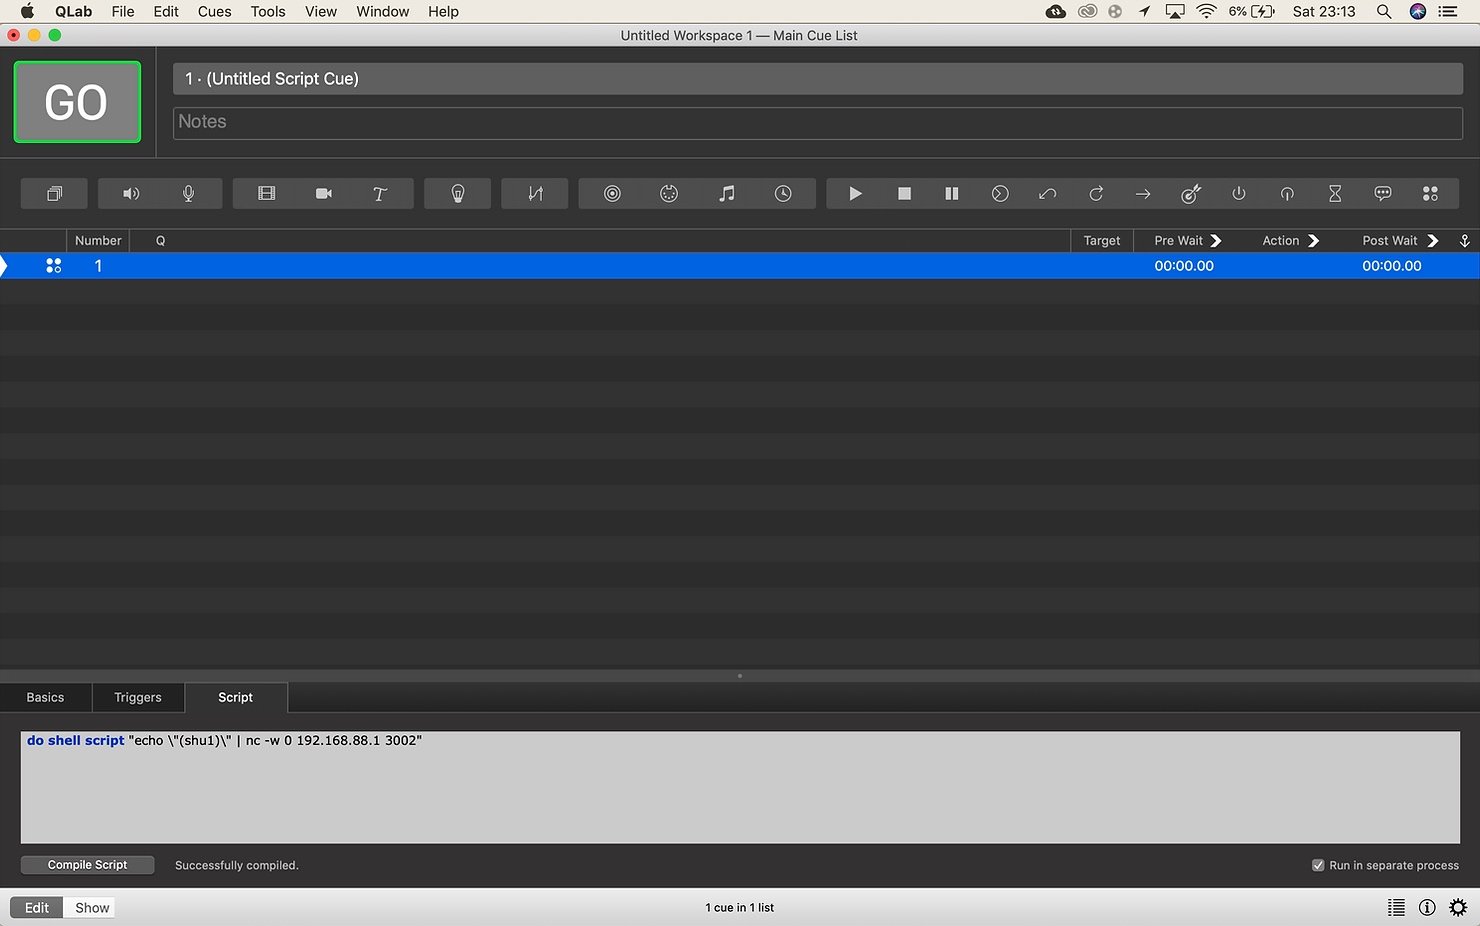
Select the script cue you just made and head over to the script tab at the bottom of the page
Step 5
You then want to copy and paste the following command into the box.
do shell script "echo \"(shu1)\" | nc -w 0 192.168.88.1 3002"
Please note that you will need to replace the following within the command with your own settings.
shu1 - Needs to be replaced with your own command, whether it be shutter on or shutter off.
192.168.88.1 - Needs to be replaced with the IP of your projector.
3002 - Needs to be replaced with the port of your projector - This will usually be found within the manual.
Step 6
Then click compile Script
Once finished the result should look something like this.
Step 7
Fire away, you should now have a working shutter script.
Note - The opposite to open the shutter again is shu0


